and the distribution of digital products.
Let's Build a Free Web Scraping Tool That Combines Proxies and AI for Data Analysis
While some websites are straightforward to scrape by using just Selenium, Puppeteer, and the like, other websites that implement advanced security measures such as CAPTCHAs and IP bans may prove difficult. To overcome these challenges and ensure you can scrape 99% of websites for free using the Scraper, you will be building this in this article, and you will be integrating a proxy tool in your code that will help bypass these security measures.
\ However, collecting the data is just one step; what you do with that data is equally, if not more, important. Often, this requires painstakingly sifting through large volumes of information manually. But what if you could automate this process? By leveraging a language model (LLM), you can not only collect data but also query it to extract meaningful insights—saving time and effort.
\ In this guide, you’ll learn how to combine web scraping with AI to build a powerful tool for collecting and analyzing data at scale for free. Let’s dive in!
PrerequisitesBefore you begin, ensure you have the following:
- Basic Python knowledge, as this project involves writing and understanding Python code.
- Install Python (3.7 or later) on your system. You can download it from python.org.
To continue with this tutorial, complete the following steps:
Follow these steps to set up your environment and prepare for building the AI-powered scraper.
1. Create a Virtual EnvironmentFirst, set up a virtual environment to manage your project’s dependencies. This will ensure you have an isolated space for all the required packages.
\
Create a new project directory:
Open your terminal (or Command Prompt/PowerShell on Windows) and create a new directory for your project:
\
- Create the virtual environment:
Run the following command to create the virtual environment:
\
- On Windows:
- On macOS/Linux:
\ This creates a venv folder that will store the virtual environment.
\
2. Activate the Virtual EnvironmentActivate the virtual environment to begin working within it:
\
- On Windows:
- On macOS/Linux:
\ Your terminal prompt will change to show (venv), confirming you're now inside the virtual environment.
3. Install Required DependenciesNow, install the libraries your project needs. Create a requirements.txt file in your project directory and add the following dependencies:
\
streamlit selenium Beautifulsoup4 langchain langchain-ollama lxml html5lib\ These packages are essential for scraping, data processing, and building the UI:
streamlit: This is used to create the interactive user interface.
Selenium: For scraping website content.
beautifulsoup4: For parsing and cleaning the HTML.
langchain and langchain-ollama: This is for integrating with the Ollama LLM and processing text.
lxml and html5lib: For advanced HTML parsing.
\
Install the dependencies by running the following command:
(Ensure that you are in the folder where the file is located before running the command.)
\
pip install -r requirements.txt\
Building the UI with StreamlitStreamlit makes it easy to create an interactive user interface (UI) for Python applications. In this section, you will build a simple, user-friendly interface where users can input a URL and display the scraped data.
1. Set Up the Streamlit ScriptCreate a file named ui.py in your project directory. This script will define the UI for your scraper. Use the code below to structure your application:
import streamlit as st import pathlib from main import scrape_website # function to load css from the assets folder def load_css(file_path): with open(file_path) as f: st.html(f"") # Load the external CSS css_path = pathlib.Path("assets/style.css") if css_path.exists(): load_css(css_path) st.title("AI Scraper") st.markdown( "Enter a website URL to scrape, clean the text content, and display the result in smaller chunks." ) url = st.text_input(label= "", placeholder="Enter the URL of the website you want to scrape") if st.button("Scrape", key="scrape_button"): st.write("scraping the website...") result = scrape_website(url) st.write("Scraping complete.") st.write(result)\
- The st.title and st.markdown functions set up the application title and provide instructions for users.
- The st.text_input component lets users input the URL of the website they want to scrape.
- Clicking the "Scrape" button triggers the scraping logic, displaying progress messages using st.info.
\ You can learn more about streamlit components from their documentation.
2. Add Custom StylesTo style your application, create an assets folder in your project directory and add a style.css file. Customize the Streamlit interface with CSS:
.stAppViewContainer { background-image: url("https://images.unsplash.com/photo-1732979887702-40baea1c1ff6?q=80&w=2832&auto=format&fit=crop&ixlib=rb-4.0.3&ixid=M3wxMjA3fDB8MHxwaG90by1wYWdlfHx8fGVufDB8fHx8fA%3D%3D"); background-size: cover; color: black; } .stAppHeader { background-color: rgba(0, 0, 0, 0); } .st-ae { background-color: rgba(233, 235, 234, 0.895); } .st-emotion-cache-ysk9xe { color: black; } .st.info, .stAlert { background-color: black; } .st-key-scrape_button button { display: inline-block; padding: 10px 20px; font-size: 16px; color: #fff; background-color: #007bff; border: none; border-radius: 5px; cursor: pointer; animation: pulse 2s infinite; } .st-key-scrape_button button:hover { background-color: #0056b3; color: #fff; }\
3. Run the Streamlit appIn your project directory, run the following command:
streamlit run ui.py\ This will launch a local server, and you should see a URL in the terminal, usually http://localhost:8501. Open this URL in your browser to interact with the web application.

Next, write the code to extract the HTML content of any webpage using Selenium. However, for the code to work, you need a Chrome WebDriver.
Install ChromeDriver for SeleniumSelenium requires a WebDriver to interact with web pages. Here’s how to set it up:
- Download ChromeDriver: \n Visit this ChromeDriver website and download the version matching your Google Chrome browser.
- Add ChromeDriver to PATH
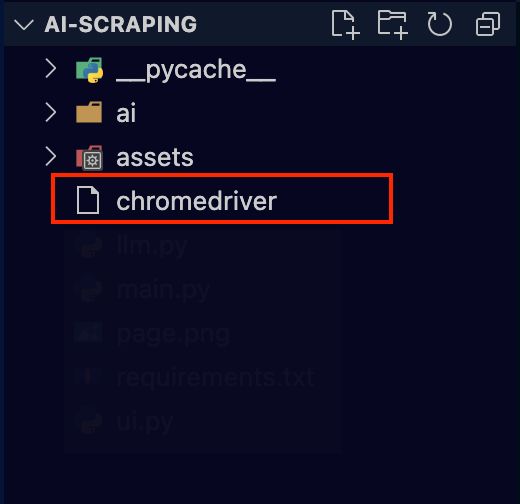
\ After downloading ChromeDriver, extract the file and copy the application file name “chromedriver” and paste it into your project folder.
When this is done, create a new file called main.py and implement the code below:
from selenium import webdriver from selenium.webdriver.common.by import By from selenium.webdriver.chrome.service import Service from selenium.webdriver.support.ui import WebDriverWait from selenium.webdriver.support import expected_conditions as EC # Function to scrape HTML from a website def scrape_website(website_url): # Path to WebDriver webdriver_path = "./chromedriver" # Replace with your WebDriver path service = Service(webdriver_path) driver = webdriver.Chrome(service=service) try: # Open the website driver.get(website_url) # Wait for the page to fully load WebDriverWait(driver, 10).until(EC.presence_of_element_located((By.TAG_NAME, "body"))) # Extract the HTML source html_content = driver.page_source return html_content finally: # Ensure the browser is closed after scraping driver.quit()\ Save and run the code; you should get all the HTML of the page you scraped displayed in your streamlit application like this:

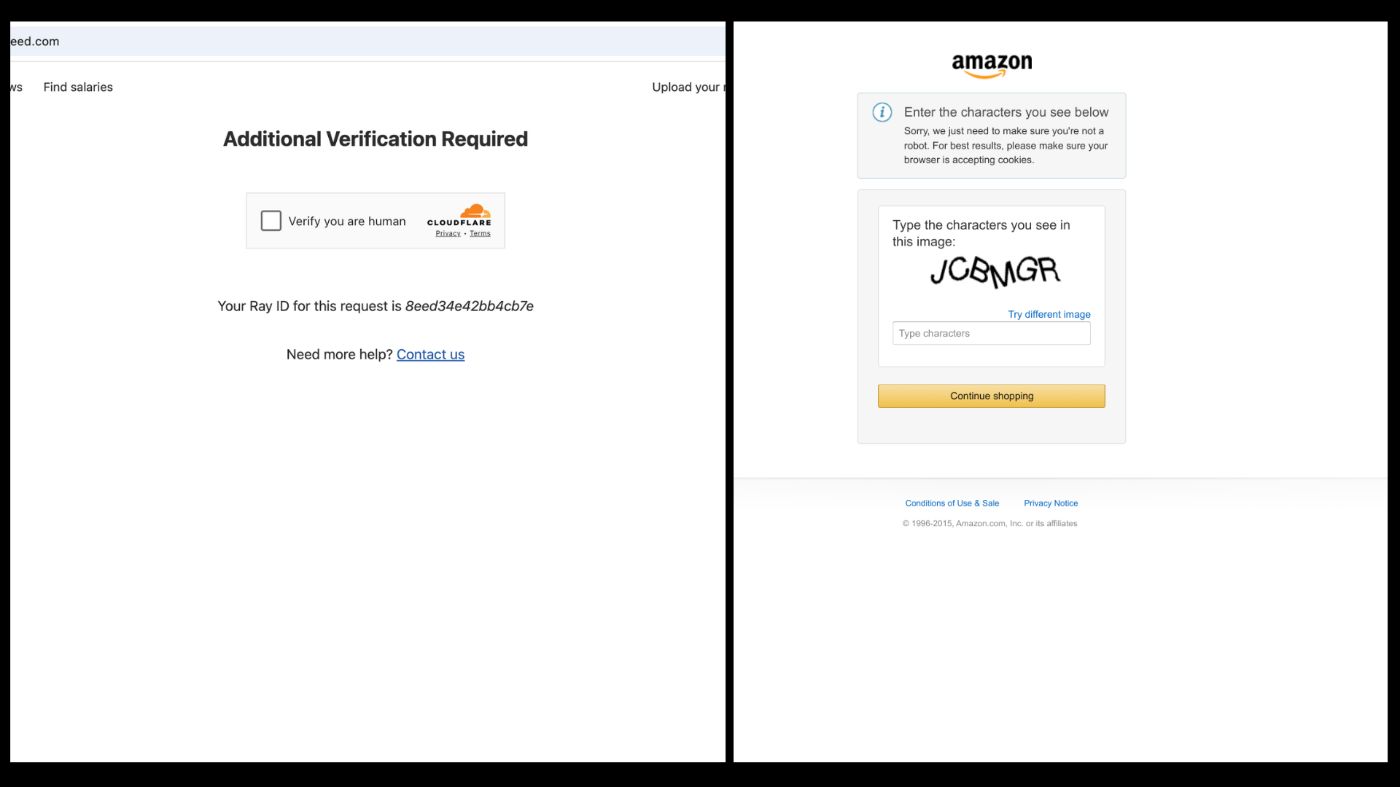
While you can now retrieve the HTML of a website, the above code may not work for sites with advanced anti-scraping mechanisms such as CAPTCHA challenges or IP bans. For example, scraping a site like Indeed or Amazon using Selenium may result in a CAPTCHA page blocking access. This happens because the website detects that a bot is trying to access its content. If this behaviour persists, the site may eventually ban your IP address, preventing further access.
\
\ To fix this, integrate Bright Data’s Scraping Browser into your script. The scraping browser is a robust tool that leverages multiple proxy networks, including residential IPs, to bypass anti-scraping defenses. It handles unblocking pages by managing custom headers, browser fingerprinting, CAPTCHA solving, and more. This ensures that your scraping efforts remain undetected while accessing content seamlessly.
Setting up Bright Data’s Scraping Browser for freeSigning up — go to Bright Data’s homepage and click on “Start Free Trial”. If you already have an account with Bright Data, you can just log in.
After logging in, click on “Get Proxy Products”.

\
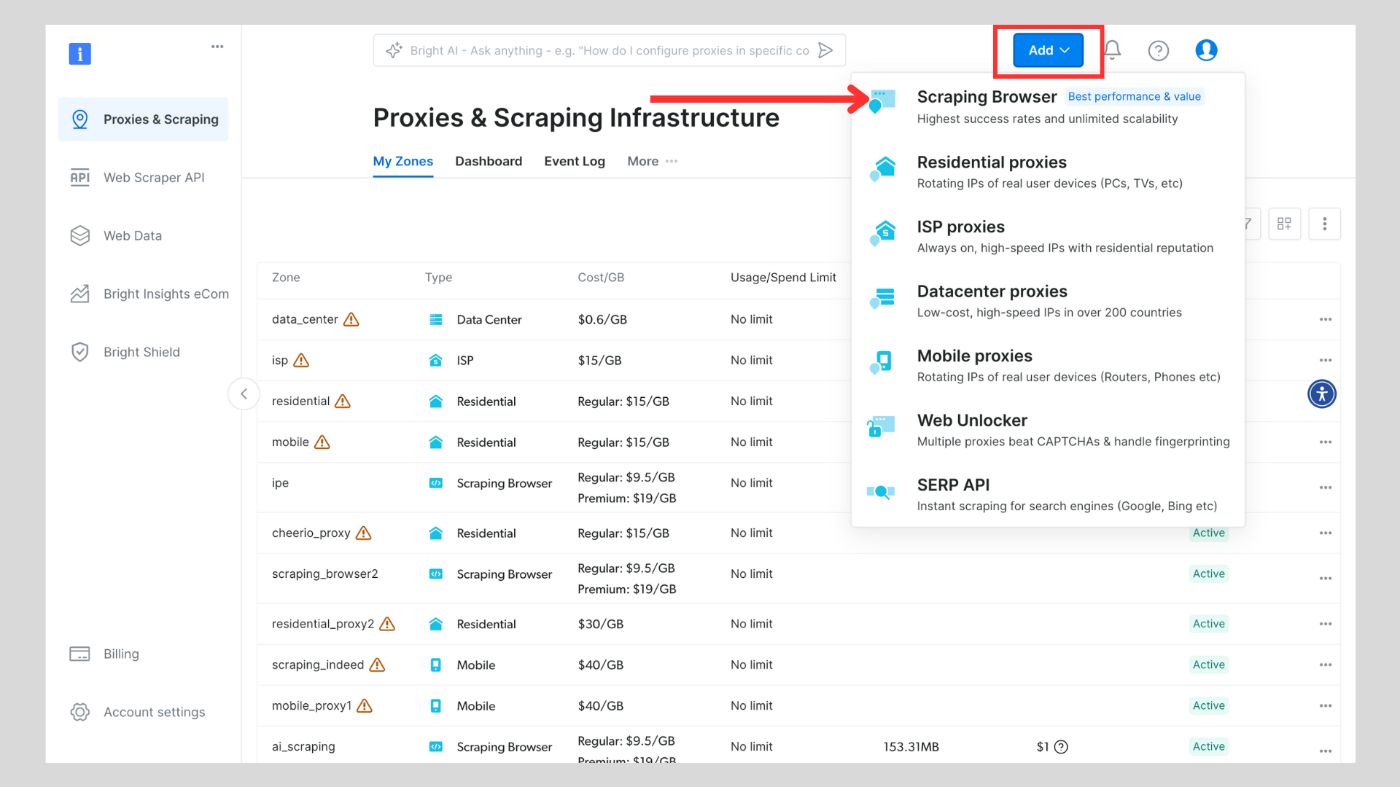
Click on the “Add” button and select “Scraping Browser.”
\
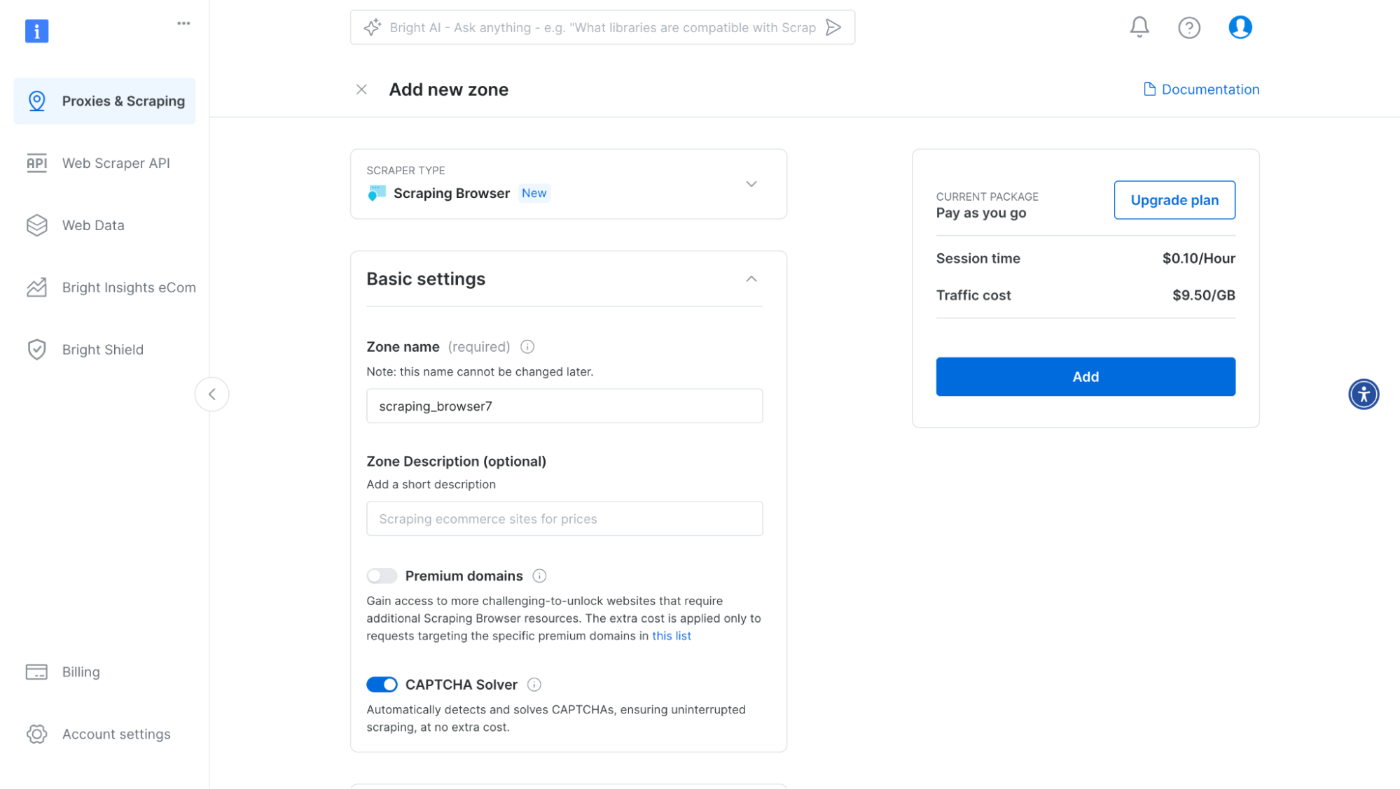
Next, you will be taken to the “Add zone” page, where you will be required to choose a name for your new scraping browser proxy zone. After that, click on “Add”.
\
After this, your proxy zone credentials will be created. You will need these details in your script to bypass any anti-scraping mechanisms used on any website.
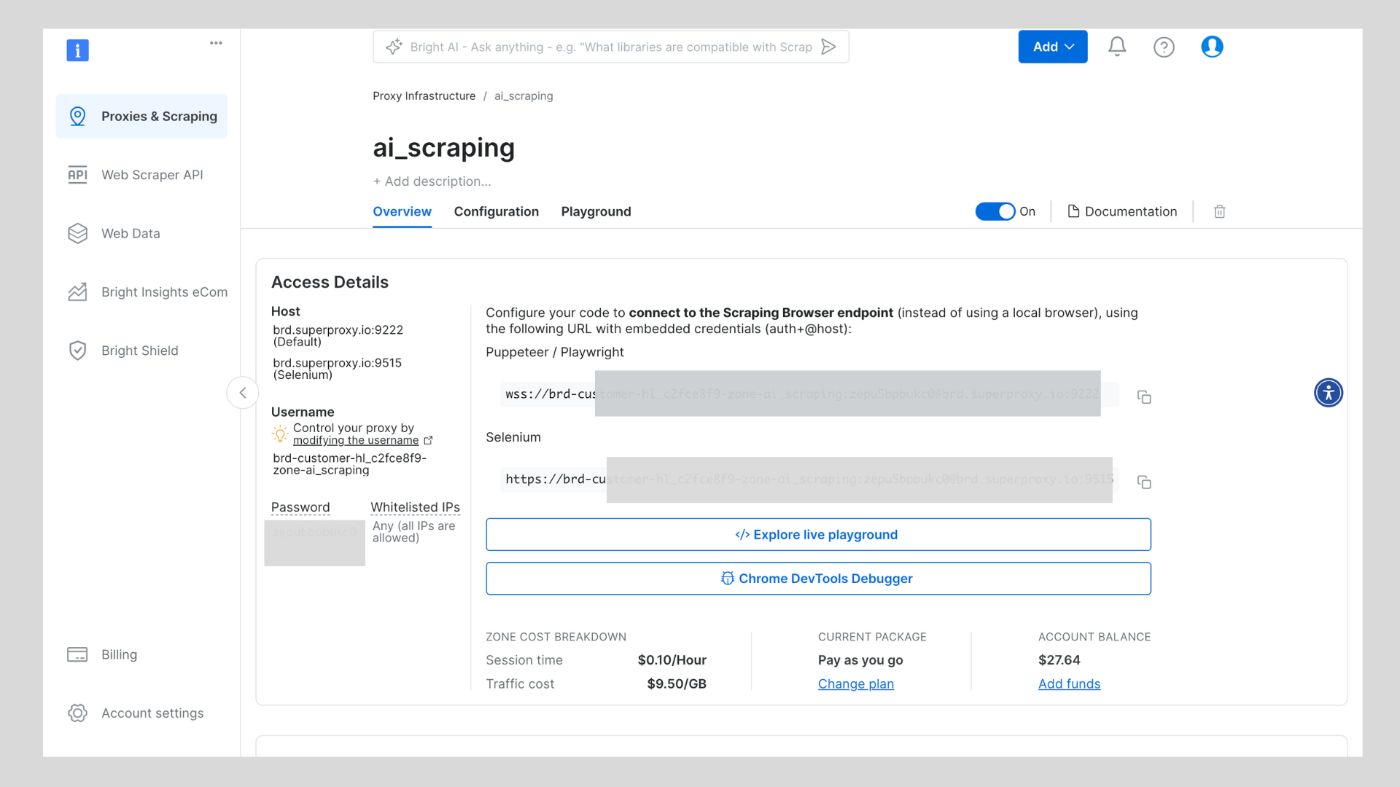
\
You can also check out Bright Data’s developer documentation for more details about the scraping browser.
\ In your main.py file, change the code to this. You will notice that this code is cleaner and shorter than the previous code.
\
from selenium.webdriver import Remote, ChromeOptions from selenium.webdriver.chromium.remote_connection import ChromiumRemoteConnection from selenium.webdriver.common.by import By from bs4 import BeautifulSoup AUTH = '\ Replace and with your scraping browser username and password.
Cleaning the Dom contentAfter scraping the HTML content of a website, it’s often filled with unnecessary elements such as JavaScript, CSS styles, or unwanted tags that do not contribute to the core information you’re extracting. To make the data more structured and useful for further processing, you need to clean the DOM content by removing irrelevant elements and organizing the text.
\ This section explains how to clean the HTML content, extract meaningful text, and split it into smaller chunks for downstream processing. The cleaning process is essential for preparing data for tasks like natural language processing or content analysis.
Code Walkthrough for Cleaning DOM ContentHere’s the code that will be added to main.py to handle cleaning the DOM content:
\
from bs4 import BeautifulSoup # Extract the body content from the HTML def extract_body_content(html_content): soup = BeautifulSoup(html_content, "html.parser") body_content = soup.body if body_content: return str(body_content) return "" # Clean the body content by removing scripts, styles, and other unwanted elements def clean_body_content(body_content): soup = BeautifulSoup(body_content, "html.parser") # Remove , Central Coast Communications, Inc.