and the distribution of digital products.
AutoResponder AI: The Smart Way to Manage Your Gmail Inbox
\ With work and private life blending more than ever, managing an overflowing inbox can be overwhelming. But what if a tool could draft replies for you, only needing your review? Meet AutoResponder AI: a serverless email assistant on AWS that uses AI to streamline communication. This article will break down how it works and how it can make handling emails easier.
What is AutoResponder AI?AutoResponder AI is an intelligent Gmail add-on that can help you manage emails and prevent inbox overload. It scans unread emails, detects sentiment, and drafts replies for those that need a response, saving them for your review. Once drafts are ready, it notifies you via email or SMS, keeping you updated. Built on a secure, cost-effective serverless system, it's ideal for busy professionals, customer service teams, or anyone who wants to stay responsive with less hassle.
Why AutoResponder AI?- Boosts Productivity – Automates responses for unread emails, saving time and effort.
- Optimizes Time Management – Uses AI to prioritize and generate context-aware replies.
- Ensures Security – Protects credentials with AWS Secrets Manager.
- Improves Communication – Crafts professional, well-structured replies tailored to each recipient.
\ AutoResponder AI is useful for business professionals, executives, sales teams, and customer service departments because it brings the might of AI-driven automation to your inbox management effort.
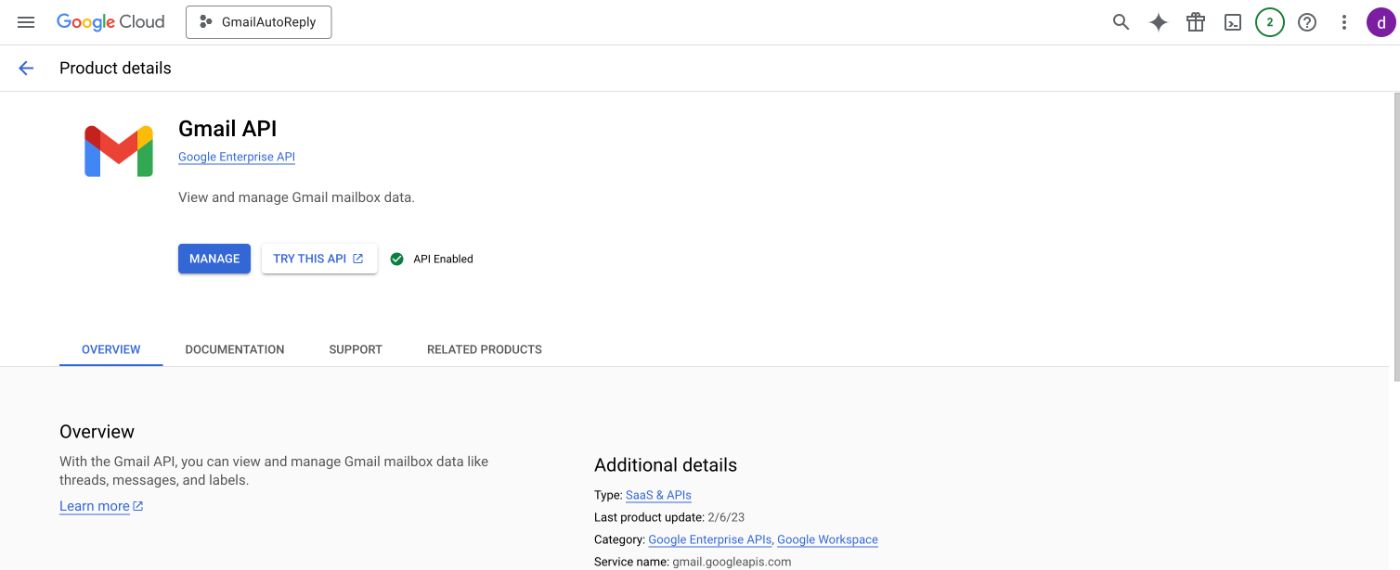
Step-by-Step Guide to Develop and Deploy AutoResponder AI #Step 1: Get Gmail OAuth Credentials from Google ConsoleTo access Gmail via API, you need OAuth credentials from Google Cloud Console.
Create a Google Cloud Project
Open the Google Cloud Console website -> Select New Project -> You may name it GmailAutoReply or whatever you choose -> Click on Create.
\
Enable Gmail API
Go to APIs & Services.
Enable APIs and Services, search for Gmail API and enable it.
\
Create OAuth Credentials
Navigate to APIs & Services -> Credentials -> Create Credentials -> OAuth client ID.
Choose the Application type: Desktop app and name it Lambda Gmail Client.
Click on Create and download client_secret_xxx.json file.
\
Generate Access and Refresh Tokens:
Make sure you have the right Python libraries installed on your local machine::
pip install google-auth-oauthlib google-api-python-clientUse the following Python script to generate tokens (replace 'path/to/your/client_secret.json' with the path to your downloaded JSON file):
Run this Python script to generate access and refresh tokens:
from google_auth_oauthlib.flow import InstalledAppFlow scopes = ['https://mail.google.com/'] flow = InstalledAppFlow.from_client_secrets_file( 'path/to/your/client_secret.json', scopes) credentials = flow.run_local_server(port=0) print(f"Access Token: {credentials.token}") print(f"Refresh Token: {credentials.refresh_token}")When you run the script, It will ask you to log in to your Gmail account and authorize the app in a browser window after running the script.
Copy the accesstoken and refreshtoken for later use.
\
\
\
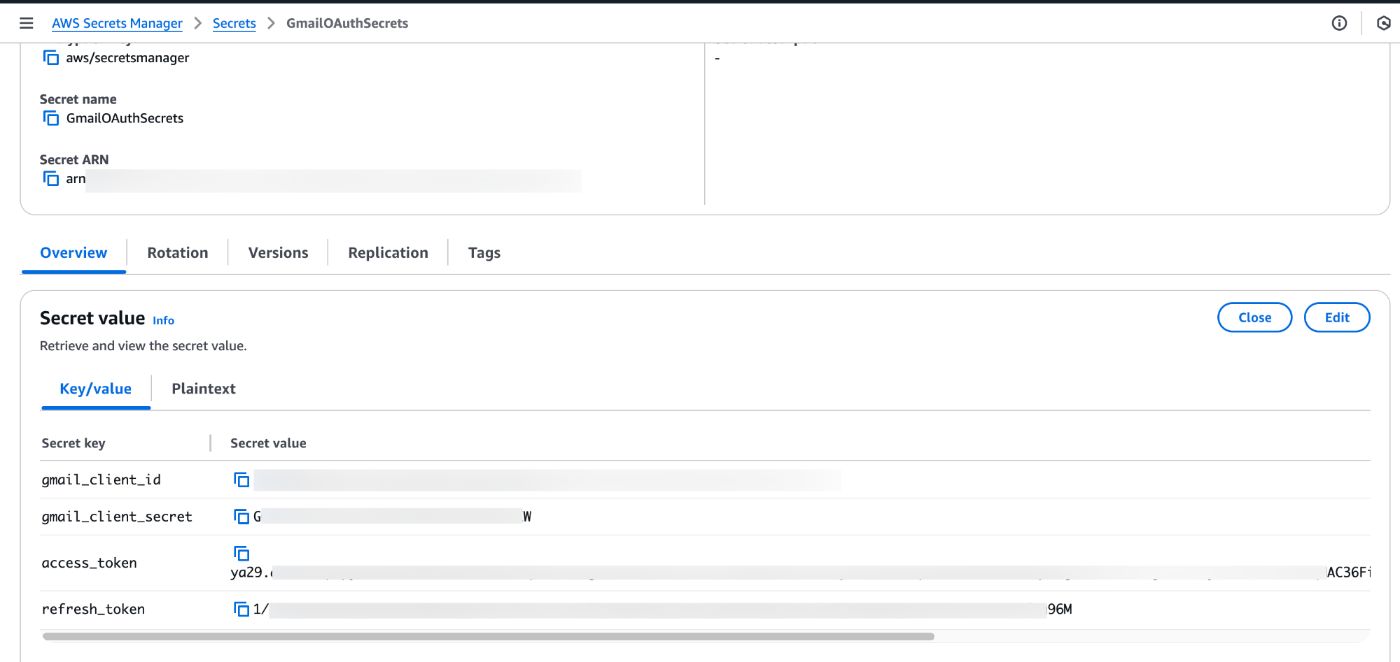
Step 2: Store Gmail OAuth Credentials in AWS Secrets ManagerTo store Gmail credentials securely, use AWS Secrets Manager. To do this, follow these steps:
Go to AWS Console and select Secrets Manager.
Click on Store a new secret and select Choose Other Type of secret.
Copy and paste the following key-value pairs:
gmailclientid (from client_secret.json)
gmailclientsecret (from client_secret.json)
access_token (from the Python script)
refresh_token (from the Python script)
Click Next, enter the secret name as GmailOAuthSecrets and click on Store.
Remember the Secret ARN which will be used in Lambda.
\
\ \
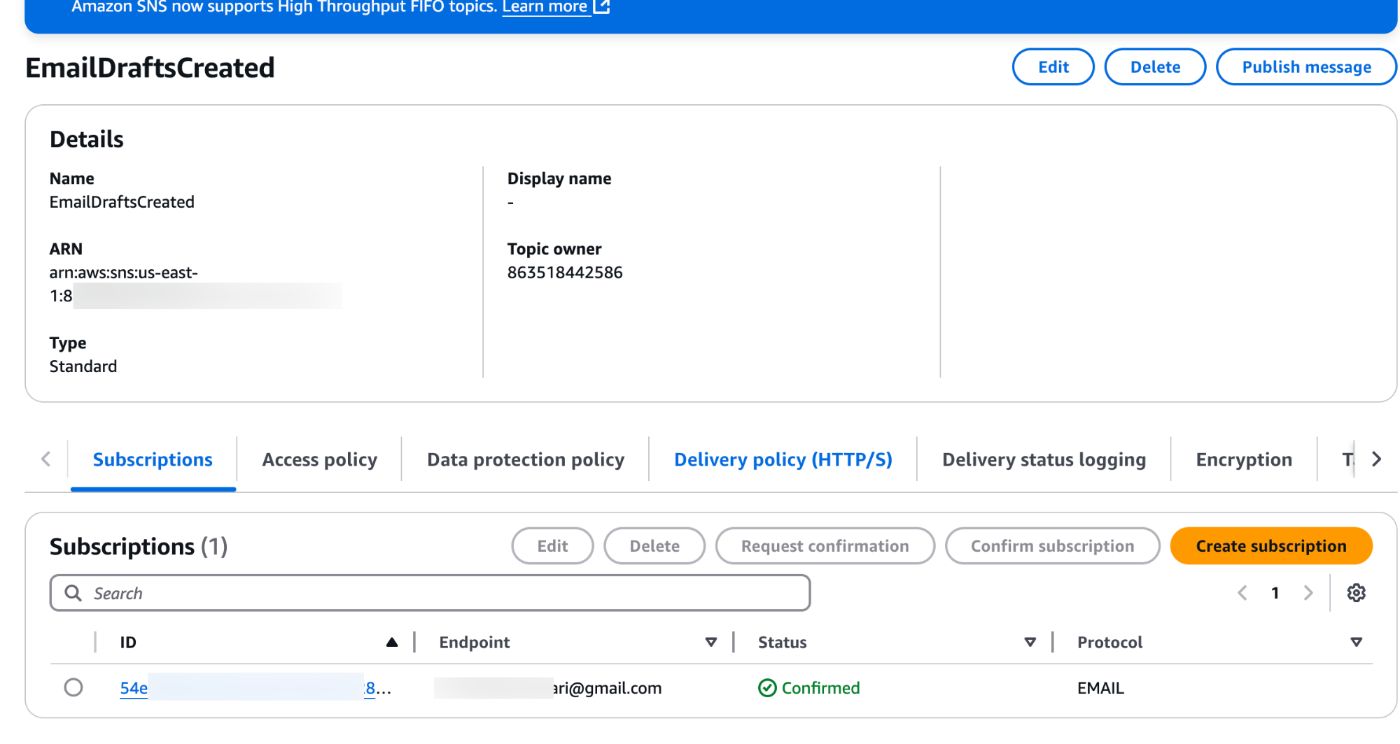
Step 3: Create an SNS Topic for NotificationsTo notify users when email drafts are created, set up Amazon SNS. To do this, follow these steps:
- Go to AWS Console and select SNS from the search bar.
- Choose Standard and then click Create topic.
- The name of the new topic is EmailDraftsCreated and click Create topic.
- The Topic ARN is copied for later use.
- Click Create Subscription, select Protocol and then select Email, and then enter your email and confirm.
\
\ \
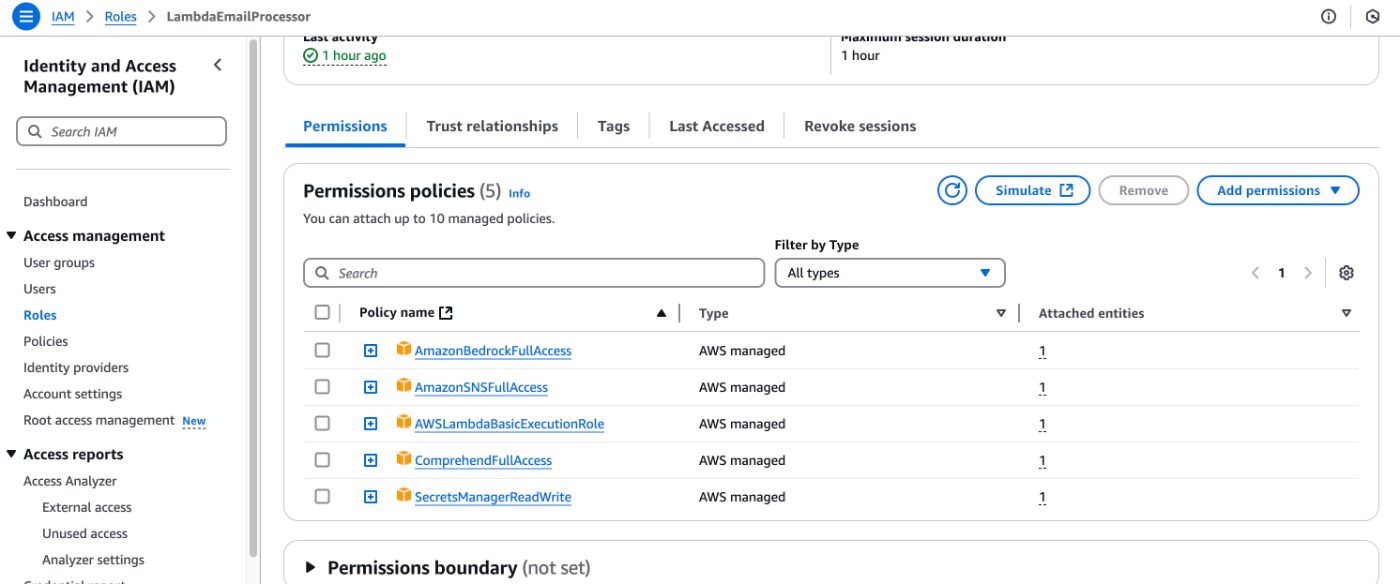
Step 4:Create an IAM Role for Lambda For Lambda to work, it requires permission to work with other AWS services.
\
Go to AWS Console and select IAM from the search.
Click on Roles and select Create role, then choose AWS Service and then Lambda.
Attach the following policies:
AWSLambdaBasicExecutionRole (for logging)
AmazonSNSFullAccess (for notifications)
SecretsManagerReadWrite (for storing Gmail credentials)
AmazonComprehendFullAccess (for sentiment analysis)
AmazonBedrockFullAccess (For AI generated replies)
The role is named as LambdaEmailProcessor and then click create role.
\
\
\
Step 5: Prepare Amazon Amazon Bedrock for the AI ResponseFirst check that Amazon Bedrock is turned on in us-east-1 region.
Go to Amazon Bedrock in the AWS Console.
In Model Access, enable Amazon Titan Text G1 - Premier or any other model you prefer.
Accept the access request.
\
This Lambda function will process emails, analyze sentiment, generate replies, and save drafts.
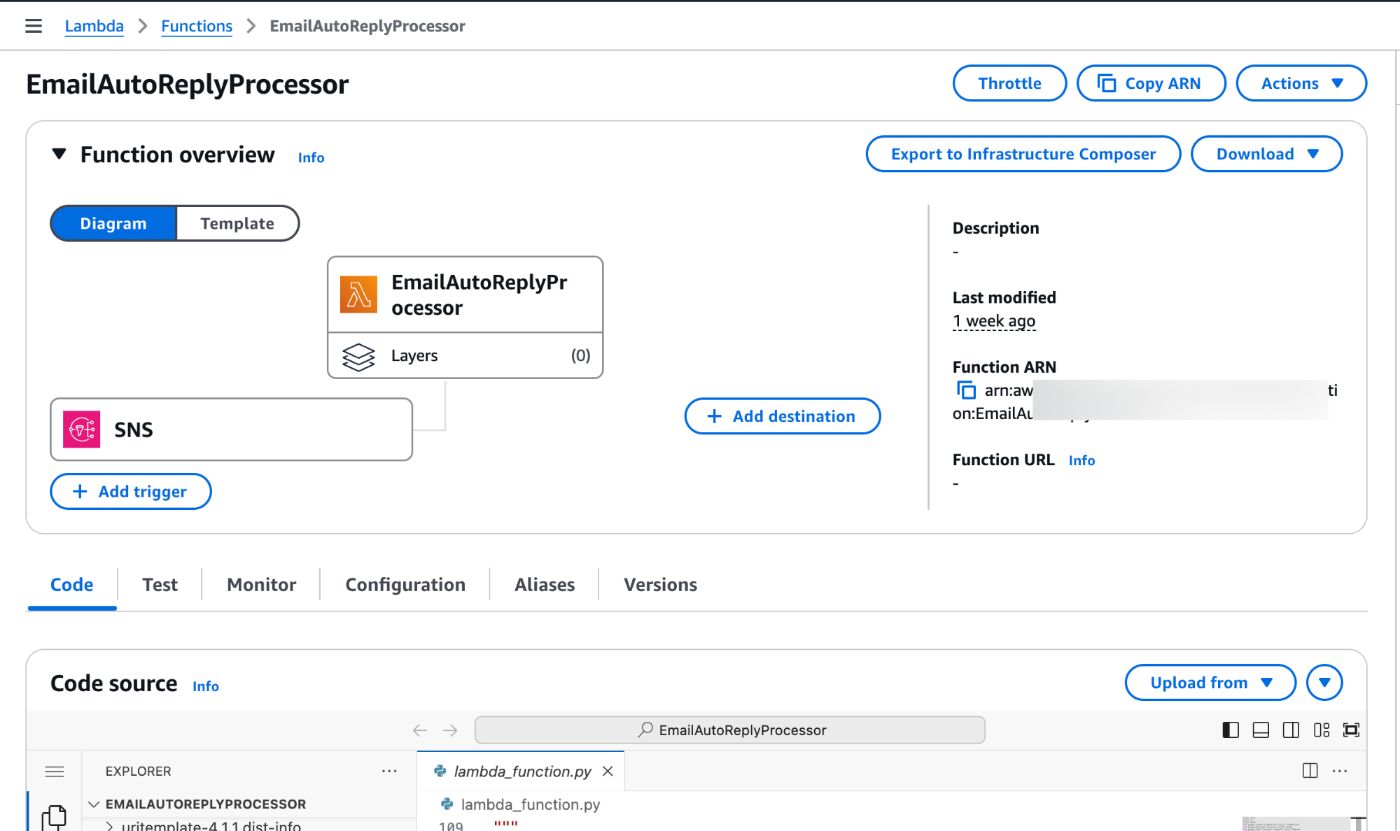
- Navigate to AWS Console; select Lambda from search and Create Function.
- Choose Author from Scratch, name it "EmailAutoReplyProcessor" and select Python 3.9.
- Assign the IAM role “LambdaEmailProcessor".
- Install required dependencies:
pip install boto3 google-auth-oauthlib google-auth-httplib2 google-api-python-client -t lambda_package/
- Save the Lambda code (provided below) as lambdapackage/lambdafunction.py.
Deploy the Code:
Compress/ZIP the lambda_package folder:
cd lambda_package zip -r ../lambda_function.zip .In the Lambda console, select the Code tab, click Upload from and select .zip file, and upload lambda_function.zip.
Set Environment Variables:
Go to Configuration; select Environment variables and click on Edit.
Add the following values: \n SECRET_ARN: Your Secrets Manager ARN (from Step 2)
SNSTOPICARN: Your SNS topic ARN (from Step 3)
Click on save button.
Set Timeout: \n Under Configuration, select the General configuration and click on Edit button then set the timeout to 5 minutes to accommodate processing multiple emails.
\
\
Step 7: Learn To Execute The Workflow Automating Execution Using Amazon EventBridge- Go to AWS Console and select EventBridge and Create Rule.
- Name it as Gmail-AutoReply-Schedule.
- For Schedule Expression, put: rate(2 hours)
- For Targets, choose Lambda function and select EmailAutoReplyProcessor.
- Click Create Rule.
\

\
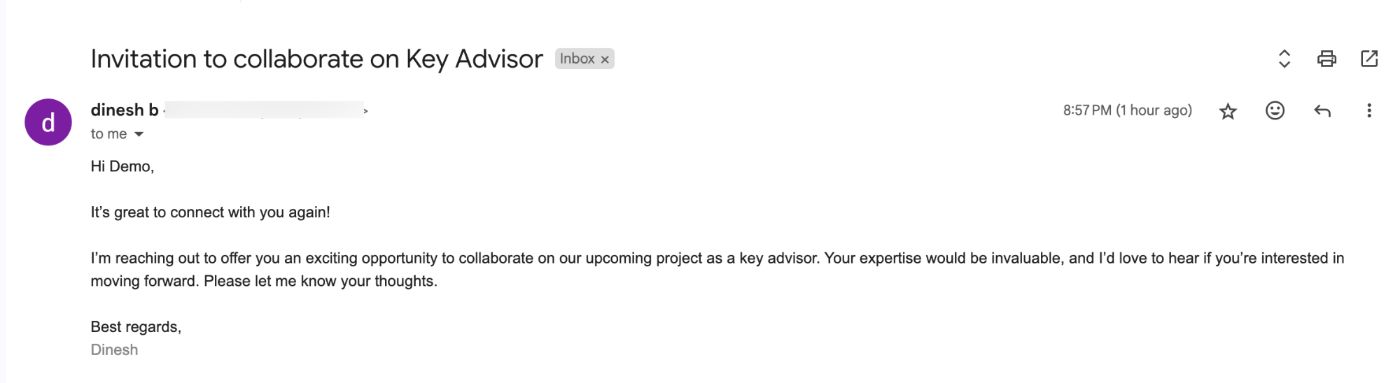
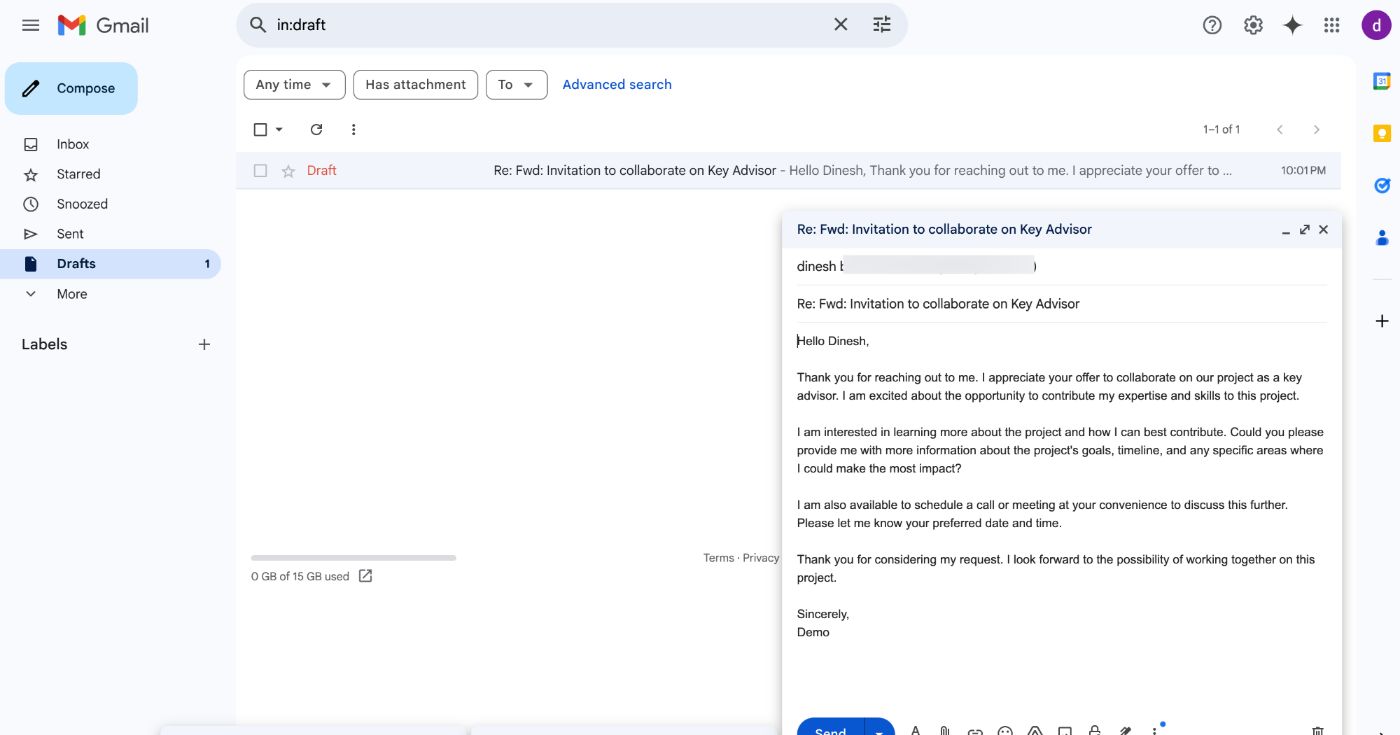
Step 8: Review Draft and Send Emails in GmailReview the final outputs of AutoResponder AI in your Gmail account at the end of the process.
\
- Sign in to your Gmail account.
- Go to the Drafts folder.
- Read through each of the AI-generated drafts, make any necessary changes, and then manually send each when you are finished.
\
\
\
\

\
\ \
What You’ve BuiltThese steps have been checked and you have successfully created AutoResponder AI, an AI-based email assistant that:
- It checks your Gmail inbox every two hours for new messages that are unread.
- Utilizes Amazon Comprehend to determine the sentiment of these emails.
- To edit emails that need your attention, it prepares professional replies with the help of Amazon Bedrock.
- It also organizes the drafts for you in Gmail.
- It informs you through Amazon SNS when there are new drafts.
\ This is a secure, cost-effective, and fully customizable serverless solution. Get a better and more efficient way of working with emails with AutoResponder AI!
\ Enjoy!
\ \